
What is automated deployment?
Traditionally, after working on part of a website, web developers would deploy their files onto a web server using an FTP or SSH client. This would be a manual process, often using an application such as FileZilla or PuTTY.
Fast forward to 2021 and as with many web development tasks, deployment is usually done in a more command-line driven manner. A modern deployment process frequently includes continuous integration with a version-controlled Git repository, hosted on a service such as GitHub or Bitbucket. The repository is often linked to an automated deployment system such as DeployHQ or Octopus, which deploys only the files that have been updated in the repository to your web server, be that a staging environment or a live site.
By utilising this approach, it means that web developers (in respect to deployment) only have to worry about pushing, pulling and merging to a Git repository and nothing else. Git keeps track of the files that you’ve changed and the site is updated automatically as soon as a successful Git push has been made. With the added bonus of no more manual FTPing or SSHing, it makes the whole process a lot more streamlined… win-win!
Some assumptions
Before we start, this article assumes the following things:
- You are comfortable with Git
- You are using GitHub and your website has a repository that you push and pull from
- You have signed up for a DeployHQ account (https://www.deployhq.com/signup)
Why DeployHQ?
Although there are a dozen or so popular automated deployment services to choose from, very few are as effortless to put into practice as DeployHQ. In a nutshell, DeployHQ is a breeze to set up, it’s incredibly intuitive, and it simply just works. On top of this their customer service (Krystal) is some of the best I have personally ever come across… I’m not on commission, I promise!
Another big advantage is their free pricing plan, which gives you 1 project with 10 deployments each day, as well as 30 build minutes. This is a great way to try out and become familiar with DeployHQ for as long as you like before upgrading. If you did want to upgrade to a paid price plan, for only £8 a month you can have up to 10 projects, unlimited deployments and 300 build minutes.
Some other great DeployHQ features are as follow:
- Zero downtime deployments
- Build pipelines
- The ability to deploy to multiple “targets” e.g. staging and production
- Deployment templates (the ability to create configuration presets)
For more information about these features, please visit: https://www.deployhq.com/features/
The process
Below I will explain the process of “hooking up” a Git repository to DeployHQ, putting the Git repository (website) live and then setting up automated deployments.
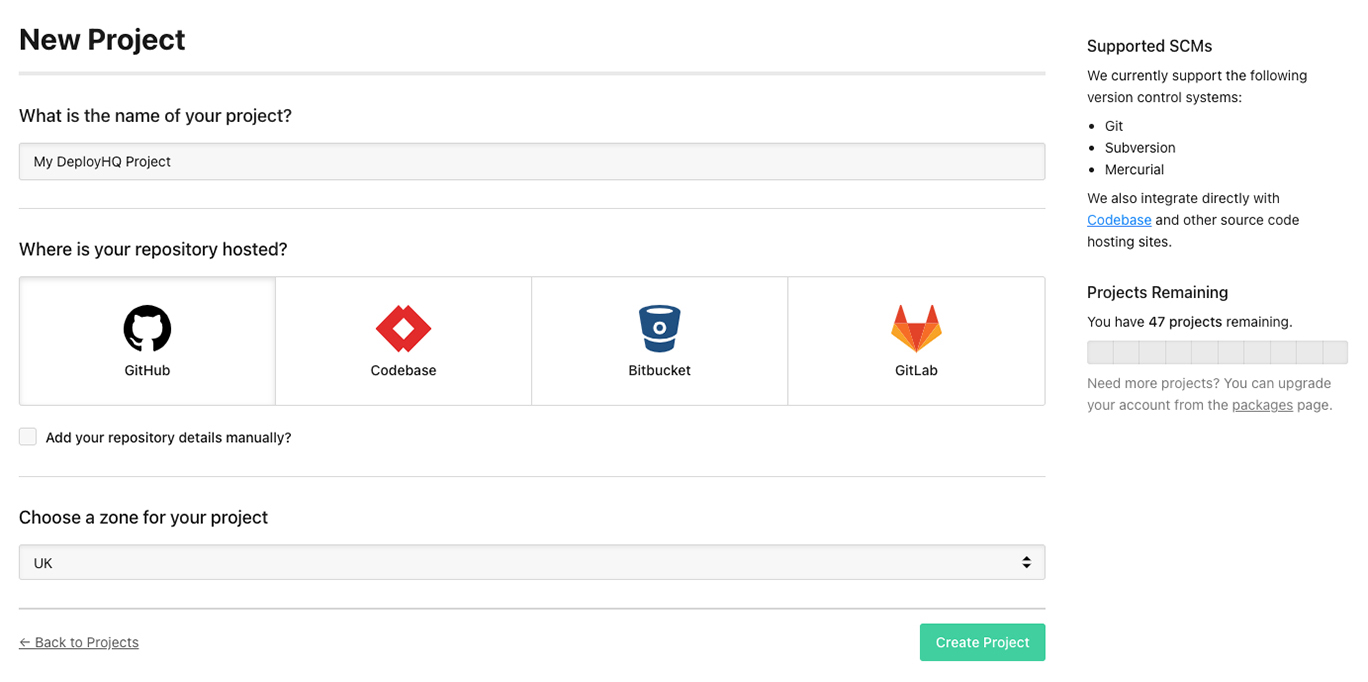
After signing up for a DeployHQ account and selecting “Create a project” you will be presented with the following screen, type in the name of your project and select GitHub and finally select the “zone” for your project, in this case “UK” 🇬🇧
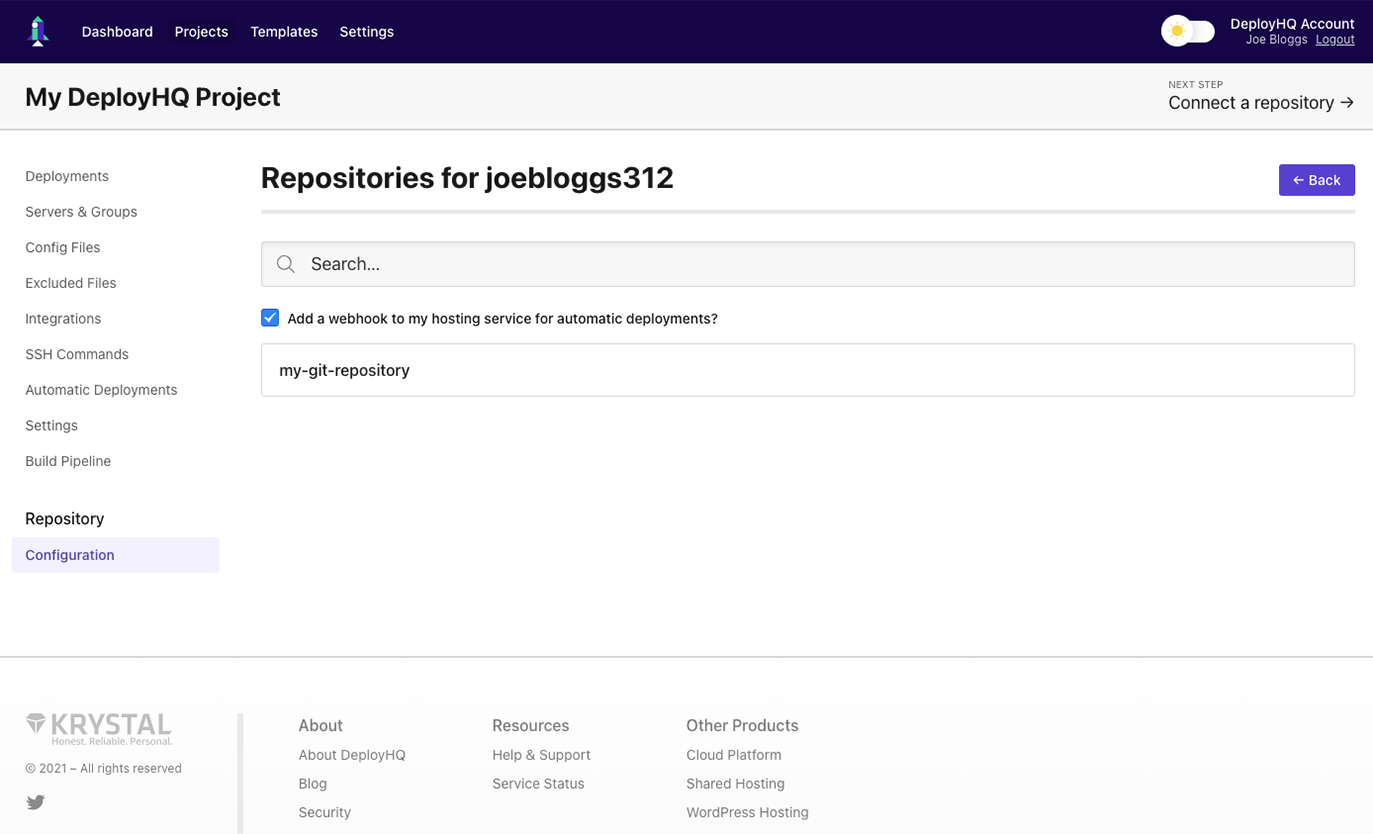
Once you have clicked “Create Project” you will either be asked to authorise DeployHQ with your GitHub account, or you will be asked to first log in to GitHub and then authorise with DeployHQ. From here it’s just a case of selecting the Git repository you wish to set up automated deployment with.
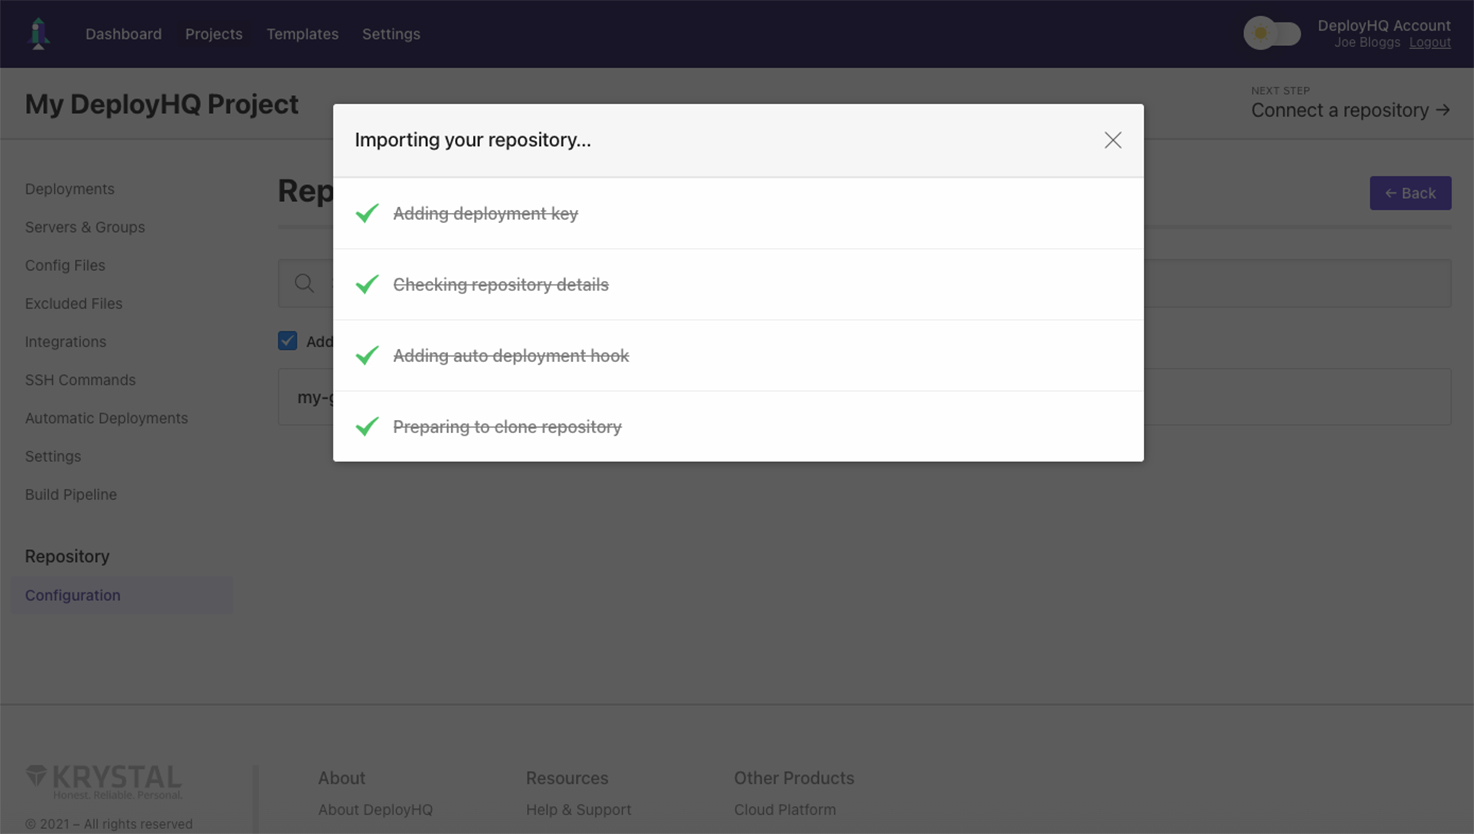
The next screen will automatically go through four different steps, from adding a deployment key and webhook to cloning your repository. There is nothing to do here, apart from sitting back and watching the magic happen.
Note: In the rare case your webhook fails to be added to your GitHub repository, this will need to be added manually. Please read and follow this guide on how to do this: https://www.deployhq.com/support/deployments/automatic-deployments/github-webhook
Next, you will need to choose your method of deployment for your Git repository containing your website, be this SSH, FTP, FTPS, Amazon S3 etc.
For the sake of this tutorial and for ease I have chosen FTP.
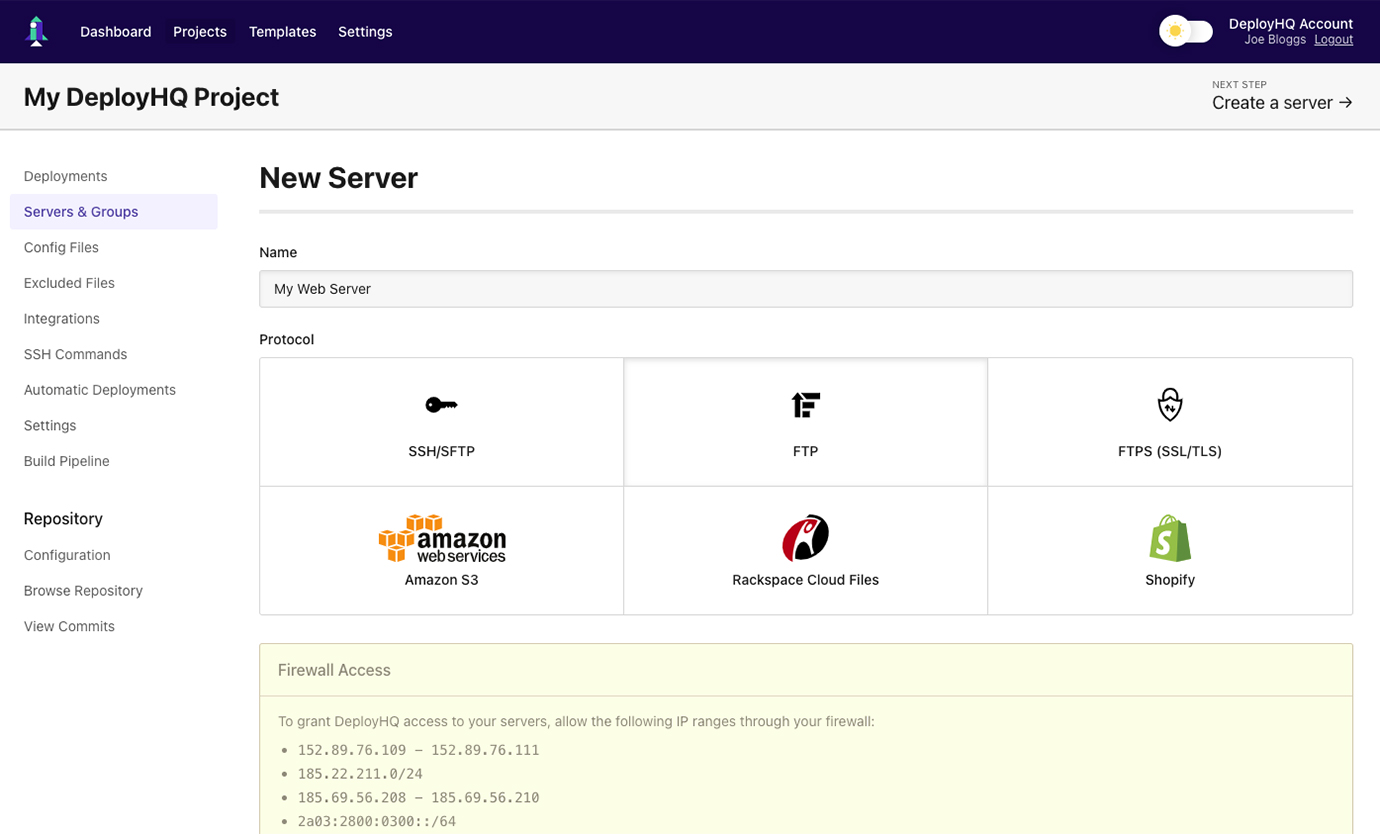
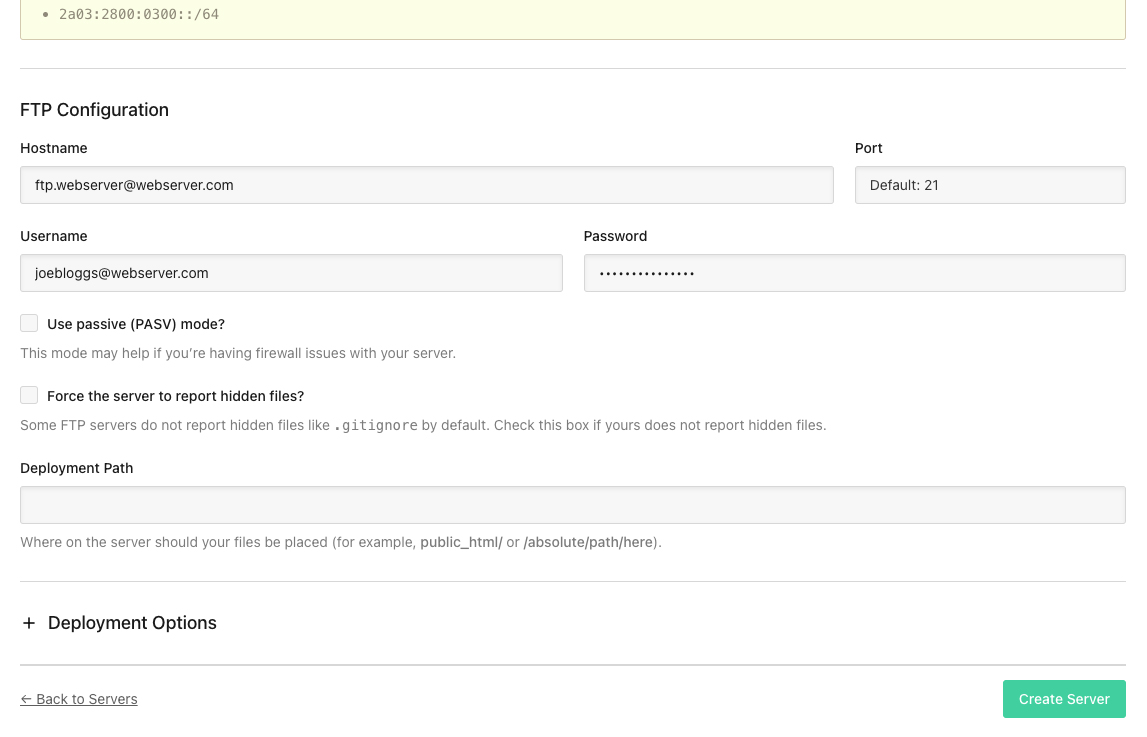
Now just enter the details of the FTP account associated with the web server on which your website is hosted. If you don’t have an FTP account, you can easily set one up in most cPanel configurations (see your web host).
Be sure to point the repository to the right location of where your website is to be hosted on your web server (Deployment Path).
Note: After selecting “Create Server” you may be presented with a “Project Configuration” (https://www.deployhq.com/blog/project-configuration-suggestions) screen regarding “Excluding Files”, “Build Commands” etc. I won’t go into any of that now, as it is very much dependent on what configuration is personally appropriate for your project. Personally, I often click “Skip This Step”, as my website is usually already ready for deployment within my Git repository.
From here, it’s a case of deploying your Git repository (website) for the first time. Ensure all the details are correct, including the repository branch and schedule deployment time, which should be set to “Start immediately” and then select “Deploy”.
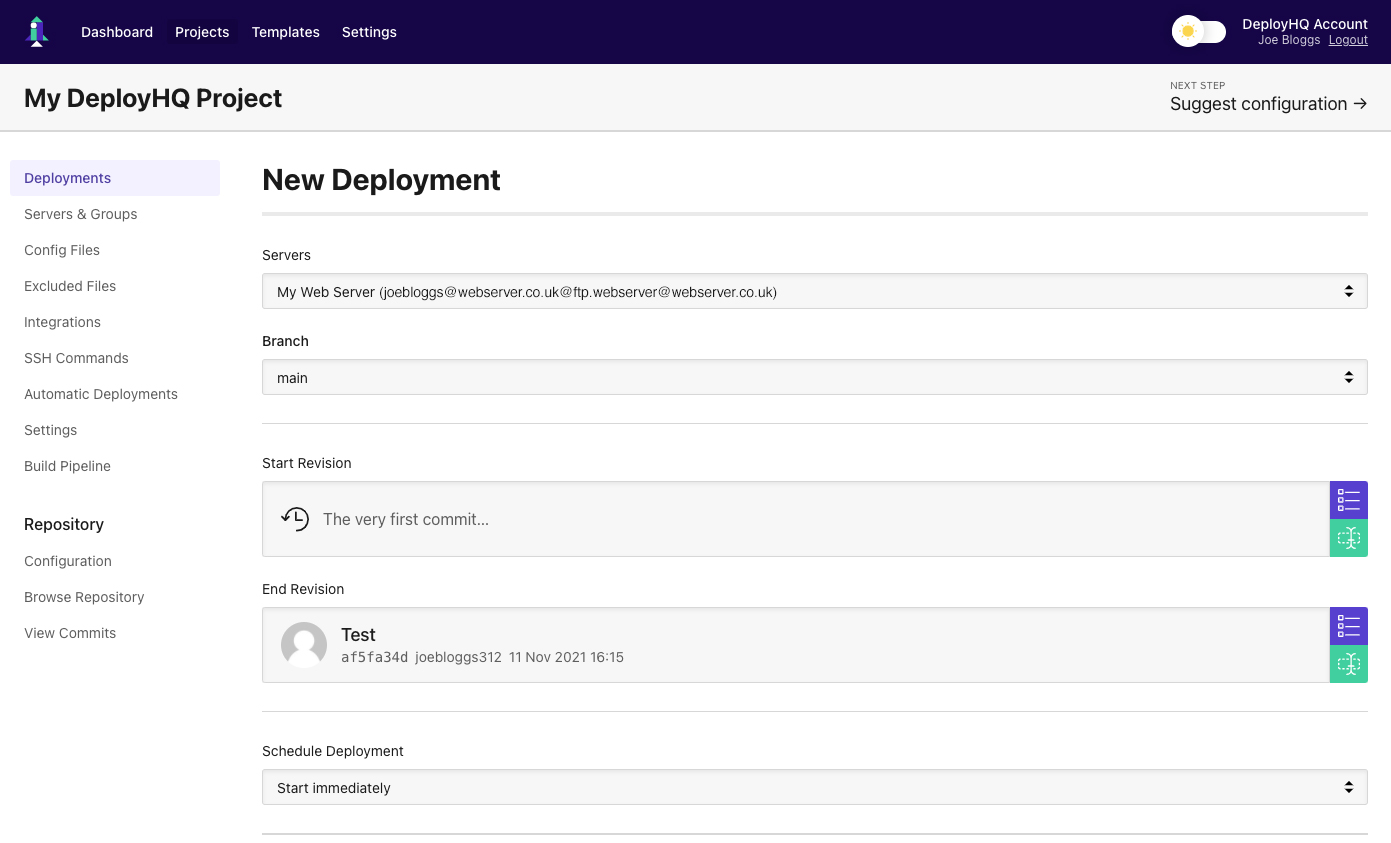
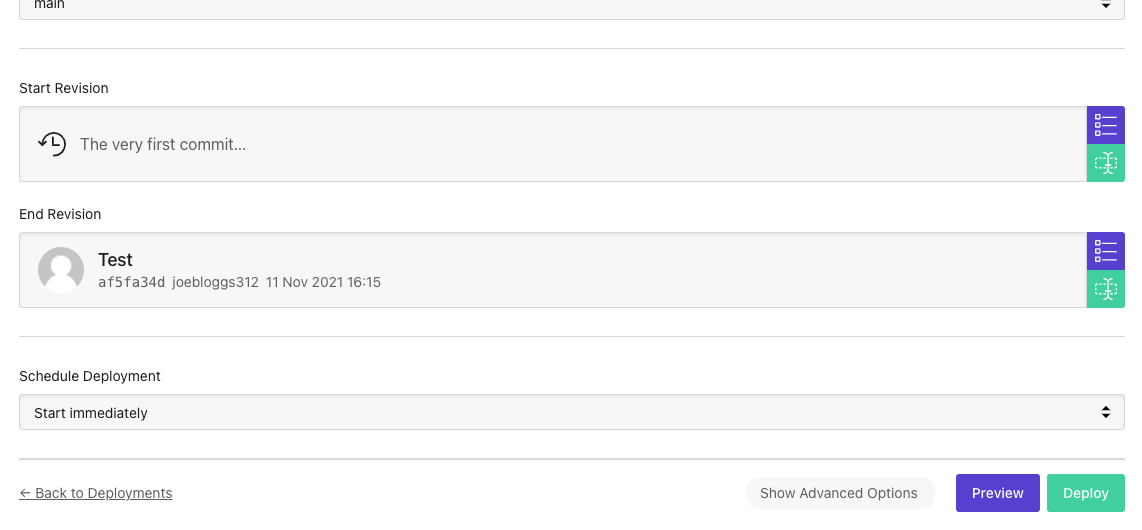
It’s now time to sit back and watch the magic happen, again. Your initial deployment may take a little while, dependent on the size of your website, as all the files within your repository will be uploaded.
Note: Future deployments will only upload the files that have changed within your repository, therefore are likely to take less time.
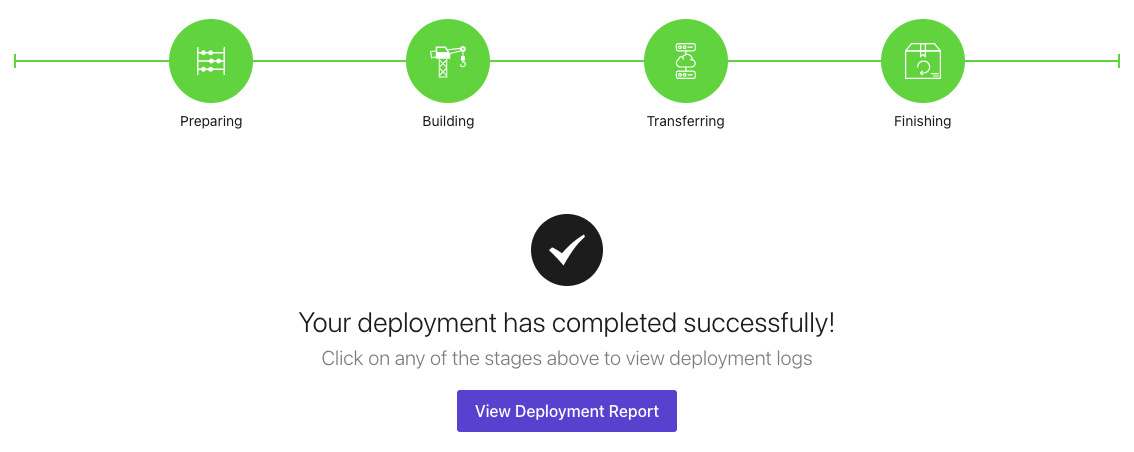
After your deployment has been completed successfully it’s time to go and visit your website URL, if everything has gone correctly then you should see your live site. If the deployment has failed you can click “View Deployment Report” to see where the deployment went wrong.
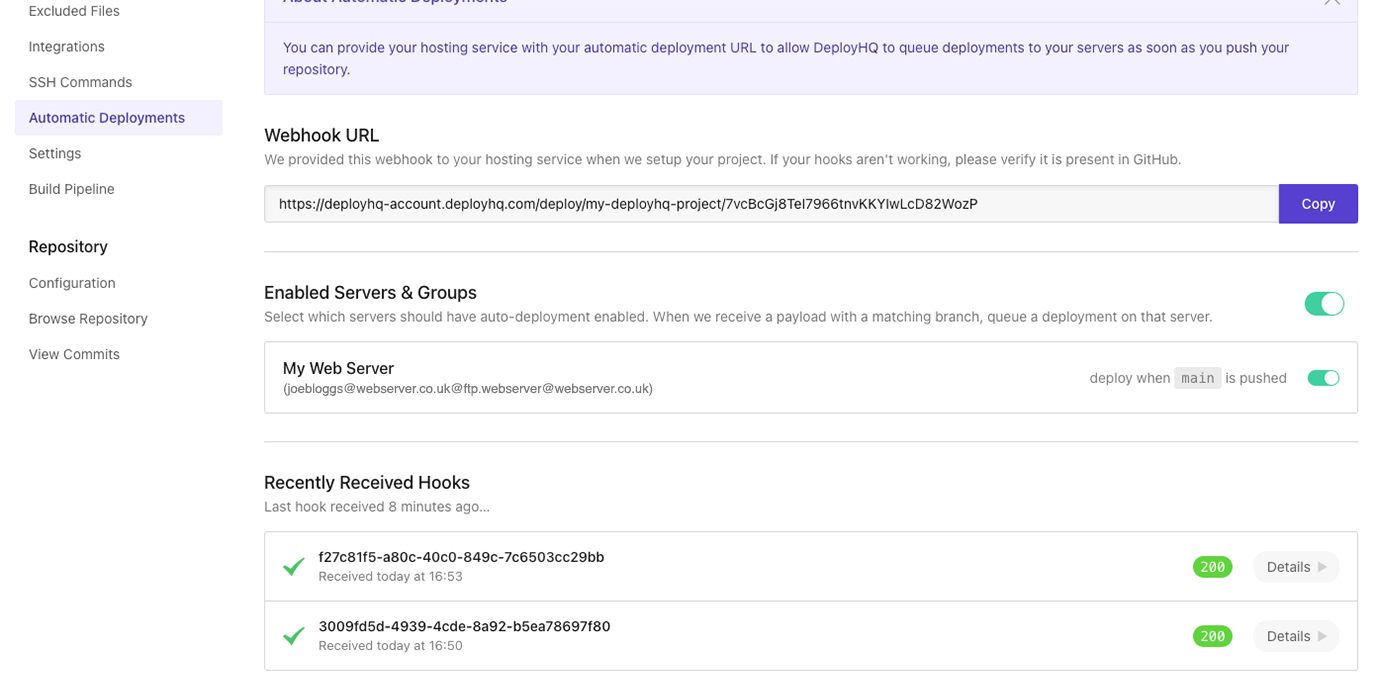
Lastly, we are going to enable automatic deployments.
This is just a case of selecting “Automatic Deployments” from the left-hand menu and then selecting the toggle next to “Enabled Servers & Groups”. Just be sure the correct web server and branch is selected.
Note: If you need to change the branch, you can go to “Configuration” under “Repository” in the left-hand menu, simply type in the branch you want future deployments to happen from, click “Update Configuration”, go back to “Automatic Deployments” and then select that branches toggle.
It’s as simple as that, from now on whenever you push to your Git repository, then the updated files will be automatically deployed to your web server.
In conclusion
To conclude this blog post, whenever I start a new website build, integrating automated deployments into my workflow is a no-brainer. In particular, DeployHQ when combined with GitHub is that intuitive and easy to set up that there is very little reason not to utilise it. If you only have one website or want some time to get to grips with the process the free version of DeployHQ is excellent, but even the paid price plans are more than worth it.
Not only do you benefit from not having to worry about keeping track of the files you have updated (or any other web developer’s files working on the same project), but not having to ever touch an SSH/FTP client and manually upload files is incredibly refreshing.
If you’re not already taking advantage of it as a web developer, automated deployment really will change your life, trust me